REVISED 10 March 2014
NOTE: This page is for a typical FULL TRANSFORMATION. If the schedule shows the subject as "Capture and Process" then s/he is only to be stripped and then dressed in the hood/bodysuit/corset/boots outfit and locked in a cell.
1) BEFORE BEGINNING, ascertain that the Subject has everything s/he needs. Check that against the Required Equipment notecard for the drone type.
1a) OPTIONAL: If you and the drone have agreed that you will Undress/Dress them yourself, ascertain that (a) you have access to their collar or other control device, (b) the device is locked (so it won't accidentally remove itself), and (c) that you understand the layout of their #RLV folders.
2) Bring the Subject into the TF Lab. Lay them down on the black Medisalve bed. (No anims here; they just lay flat.)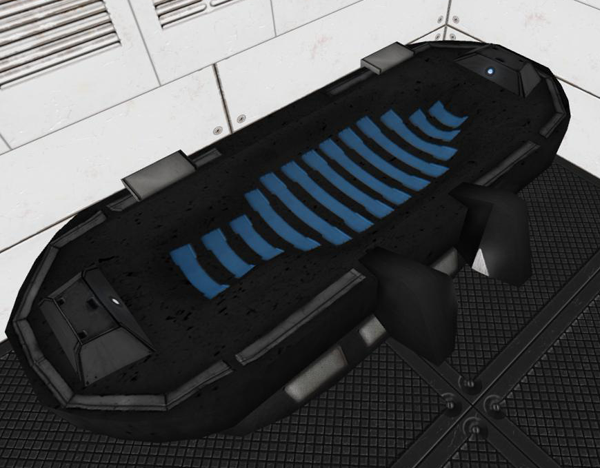
3) RP/RLV removing their clothing. If they are afraid or are fighting you, inject a sedative. (In fact, you can inject a sedative ANYTIME they're belligerent.) Do NOT remove their hair; that should be part of the surgical procedure. This whole thing can be scary and a bit humiliating; try to comfort them; make them know you are your friend and want what is best for them, and that this is what they have really wanted their whole life.
**Milestone: the Subject is now naked (except possibly for their collar/control device).
 4) Move them to the small room with the Automated Surgical Table. Do NOT let them sit yet! Stand at the console and RP programming the type of drone they will be. THEN sit them down. The arms will move; you can RP the changes they are making to the drone's body. This can include removing their hair, but some TF's might take their legs, arms, maybe even the head completely off.
NOTE: THE SUBJECT has control of the menu which just rolls them over back/stomach. You can RP doing that, but they have to actually click the bed, get the menu, and click the button to roll over.
If there are new body parts to attach, they can be put on now. But NOT gloves, boots, corsets, etc. (We're going to spray them with latex next, so those parts should not be on them yet.)
**Milestone: the Subject's human parts have been removed, and there may be some new parts attached. BUT any exposed skin still looks human.
 5) Move the Subject to the next room containing the Cryo Chamber. Do NOT sit them in there yet; move around behind the console first, THEN have them Sit in the chamber. It will close, and run its process. THE RP: is the coating of their new body with either latex (most drones) or plastic (pleasure drones). If they have a latex skin, this is where they apply it; if they don't then nothing may actually take place in here other than the RP: "The new drone's body is permanently sealed in indestructible latex [or plastic]."
**Milestone: all exposed skin is now either opaque latex or plastic (like the Pleasure Drone's doll body).
6) Move them back to the Automated Surgical Table again. Now you're going to put on all the outer accessories--boots, gloves, corsets, helmet. Do NOT put on clothes (for Pleasure Drones, for example).
**Milestone: you should have your complete Drone, with all attachments.
 6) Move the Subject to the Stasis Chamber out in the main room. Sit them on it, and then move around to the control panel.
CLICK the control panel and a video screen will pop up. Then CLICK the two small video screens at either side of the Subject; the whole thing will glow with lots of nice animated textures.
THE RP: the Stasis Chamber activates the nanites in the new skin and devices applied previously. This process permanently bonds these devices to the new drone's body; making it one integrated cybernetic device. Be sure to note that the outside skin is now extremely sensitive, even more than their human skin was.
WHEN FINISHED: click the left screen to turn off some of the texture. THEN click the RIGHT screen to eject the Subject (assuming they have RLV on).
**Milestone: we now have our physically-complete drone, ready for final programming.
 7) Move the new drone CAREFULLY to the Regeneration Table. RP how they must rise and move VERY SLOWLY as they get used to their new body. Note how even the gentle breeze from their slow movement excites their new skin; remind them it will be like that from now on (and how wonderful that will be).
Sit them on the Regeneration Table, and then go stand at the end. Click the table for the menu:
Use X-RAY and RP doing a full body scan; report that everything looks perfect.
Use BODY SCAN and report that the nanites are also working perfectly; the skin and other parts are bonding and integrating fully with those human parts still remaining.
Then (best part, I think), do the BRAIN SCAN. RP that the device is now draining all of the Drone's previous memories into our computers, where they will be stored and used for research. The device then programs the Drone's now-cleared brain with only what they need to know for their new life.
NOW is also when they should receive their Conifguration -- their new name, like "K-18" or "MerDrone X-99." (They may not be able to do the name change immediately, but tell them what it is in the RP.)
**Milestone: our new Drone is complete, and programmed, but may be still naked. IF there is clothing to put on the drone--on a Pleasure Drone, for example--it will be done in the next step.
 8) Finally, move the new Drone to the Spyder; that huge thing with the white table in the middle. You must FIRST CLICK THE TABLE and select a pose, then wait for the Pose Ball; sit them on the ball.
IF there is clothing, NOW is the time to put it on the drone. That way the testing will include making sure the clothing fits properly and doesn't bind anywhere.
There are several poses and anims on this, several of a sexual nature. A Pleasure Drone should be tested thoroughly; other Drones maybe just a couple of these with the RP of moving their body around to be sure all the joints work.
**Milestone: the Transformation Drone RP is completed. We still have to install the TDP Doll Chip, but that takes quite a bit of OOC conversation. We'll do a separate How To about that.